Organization Settings
Access the organization settings from the gear icon on the top right of the menu bar. This page allows you to manage administration tasks, such as Users, Role Permissions, Audit Logs, Attribution Keys, and LMS configurations.
Projects
You can create new Projects from this page or manage the existing Projects. The list of project shows the number of Sessions.

Each Project has actions to Edit Project Details, Manage Keys, and Delete the Project. Press the ... button to access these options. Manage Keys opens the Project Keys dialog described below.

Project Details
These are options that were selected during the project creation.

Project Keys
The Project Keys dialog holds two per-project keys. Open it from a project's ... menu → Manage Keys, or from Manage Developer Key in the gear/settings menu.
- Developer Key — your developer API key, used at development time to upload scenes, dynamic objects, and other assets. This key can expire.
- Application Key — your application API key, embedded in your built application to authenticate it with the data-collection pipeline and route its data to this project. This key never expires.
Keep both keys private. Never check them into your source code repository.

Team Members
This displays a list of all Users in the Organization, including their User Name, Email, Last Login, MFA (Multi-Factor Authentication) Status, and Roles. The Invite Team Member button displays a pop-up to add a User by Email and set their Role.

From this page you can change the User's Role. This includes setting Roles on specific Projects in the Organization.
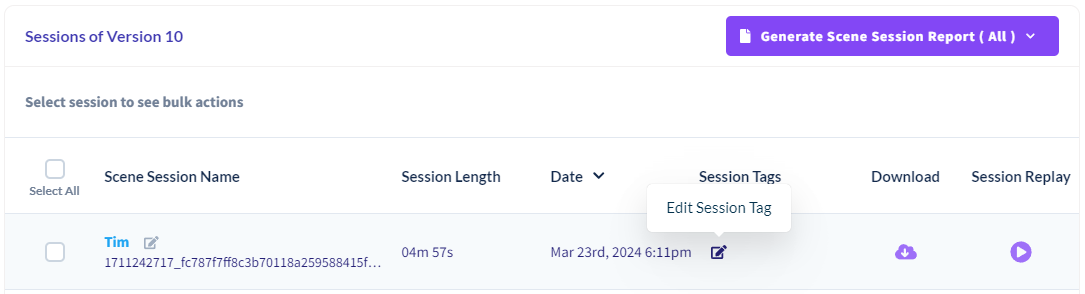
Session Tags
Session Tags allow you to mark and filter Session data. This can be used for A/B testing or simply indicating noteworthy sessions. There is a limit of 100 tags per organization and 10 tags per session.

Creating Tags
You can create session tags from the Session Tag Page, or by clicking the CREATE NEW option in the Apply Session Tag dropdown menu
You have the option to set the name, color, and associated projects.
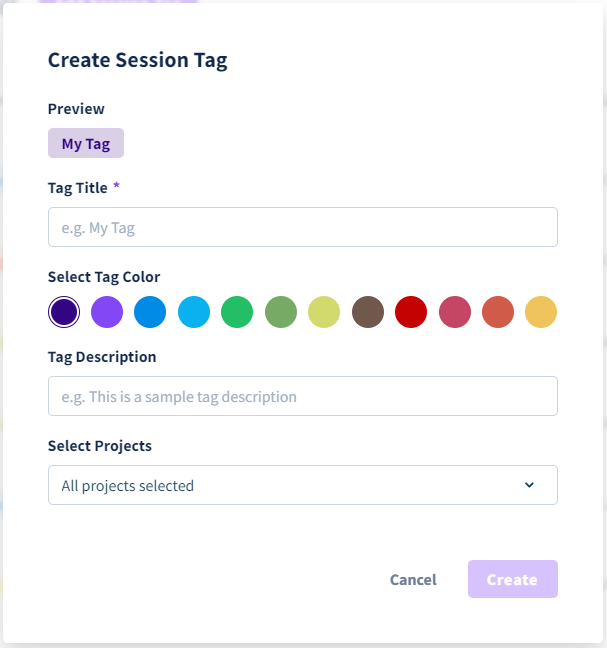
Tag colors are purely for aesthetics and visual organization, and does not have any functional differences.
You can choose which projects the Session Tag shows up on. If you select all (or none) of the projects, it is considered an Organization-Level Tag and shows on all pages, including projects you create in the future. Associated Projects can always be changed later on by clicking on the "Edit" button.
Note
When creating a new Session Tag, the tag must not exceed 12 characters.
Best Practices
Session Tags and Session Properties fill a similar role to organize your data. Both Session Properties and Tags can be used to filter Sessions on the Sessions and Analysis pages. One advantage of Session Properties is that they can hold multiple values (such as numbers and strings) while Tags cannot.
Tags can isolate data for metrics, making it powerful and simple for A/B testing. You can also change Tags after the session is recorded - something you cannot do with Session Properties.
Audit Log
This page is limited to Domain Administrators and Organization Administrators.
This page shows a list of all actions performed on the Dashboard. This includes Creating API keys, Uploading Dynamic Objects, Creating PDF Reports, Inviting Users, and more. This is helpful for tracking which users are active on the project and how the project has changed over time.

Custom SSO
This allows you to configure custom Single Sign-On configurations for your organization. Contact support if you need this feature.
Identify
Identify ties XR sessions to verified participant identities by having participants sign in through your organization's SSO. You configure the SSO connection and the participant launch page from this section. See the Identify page for setup and the participant sign-in flow.
Manage LMS
We allow you to connect our Objectives System and send Objective Results directly to your external Learning Management System.
Connecting to your LMS system is easy; there's two steps:
- Create an LMS configuration, to point our system to your Learning Management System.
- Attach the configuration to an Objective. Results from this Objective will get sent to your Learning Management System.
Terminology
Some terms you will see on this page:
- LMS -- Learning Management System; An external source where activity results will get sent to.
- Objectives -- Our Objective system. An Objective is equivalent to an activity; View the documentation
- Participant -- Person doing the activity/Objective. A Participant is equivalent to an user; View the documentation
Creating an LMS Configuration
An LMS configuration is how our system knows where to send the Objective results. Organization Administrators can create LMS configurations from the administration page.
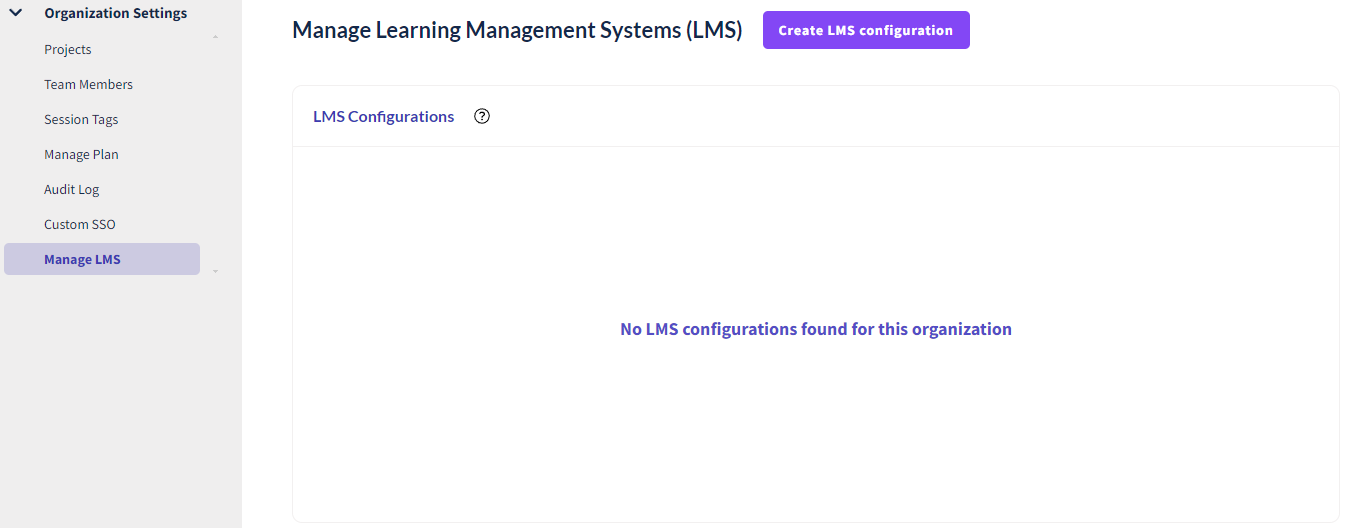
Press Create LMS Configuration, and the creation window will popup. This is a two step process.
Step 1: Basic information and LMS type
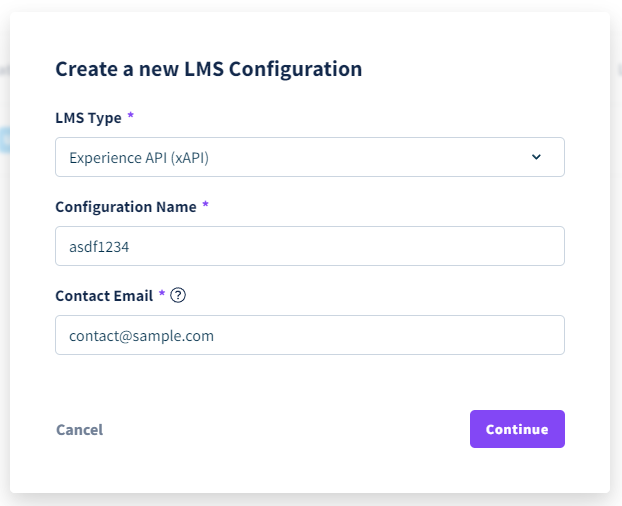
- Configuration Name: The name of your configuration. This is used to attach your configuration to an Objective later.
- Contact Email: If something goes wrong (for example, we can't reach your LMS), we will send alerts to this email.
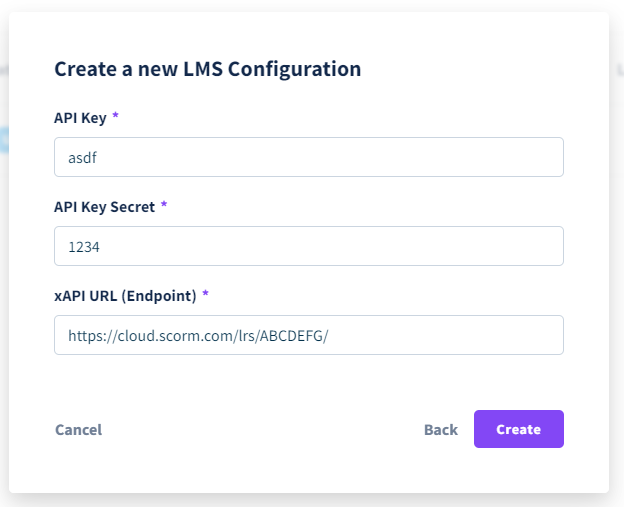
Step 2: LMS specific properties
The second page depends on the LMS system you choose in the first step. More details below
Attaching a Configuration to an Objective
Once you create an LMS configuration, you're able to attach it to as many Objectives as needed. This is done through the Objectives page. Choose the Objective you want to attach a configuration to:
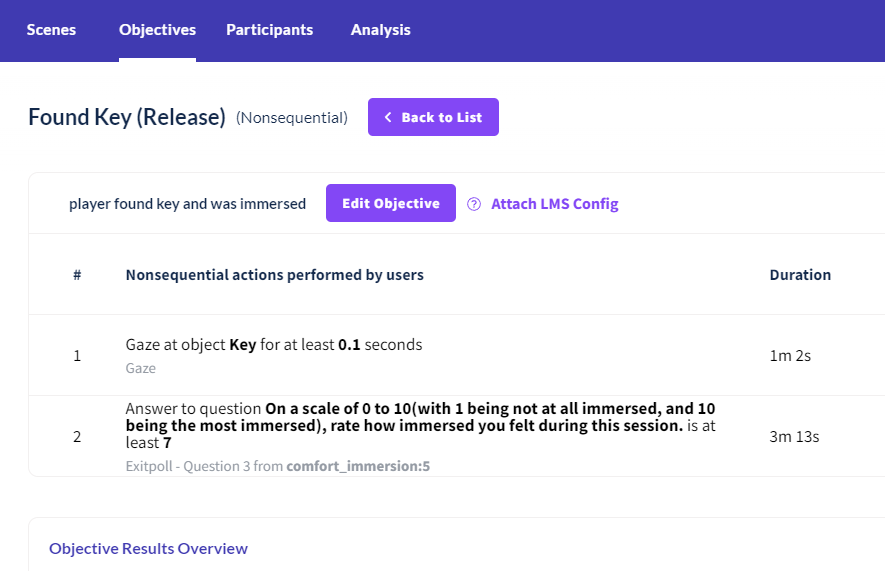
Then press the Attach LMS Configuration. A drop-down appears showing your configurations.
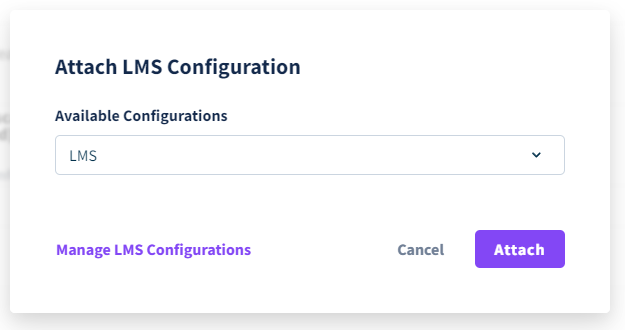
Once you attach the configuration, that's all you need to do. Results for this Objective will automatically be sent to your LMS system.
Note
Participant ID's need to be a valid email address for the result to get sent to the LMS
Fixing LMS Configuration Errors
If there is an error with your LMS, we will send an alert to the contact email provided in the LMS configuration. If you go to the LMS configuration page in the administration tab, you will see the status of each configuration.
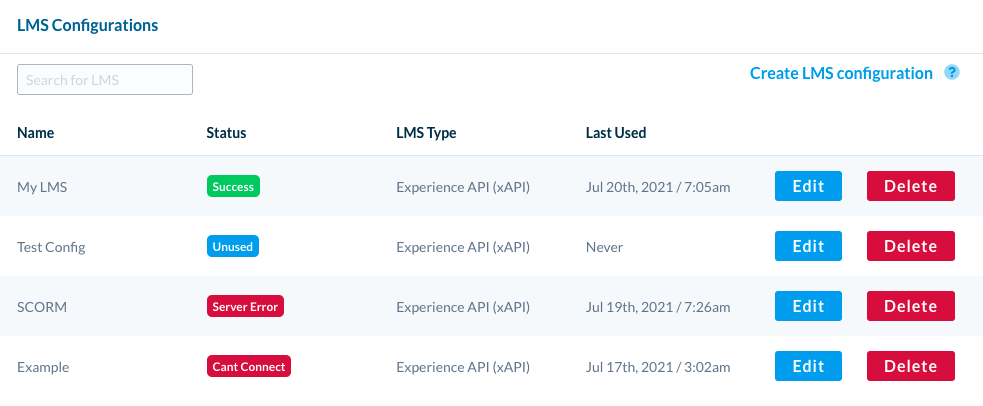
Two errors are possible:
Cant Connect-- We cannot connect to the URL you provided. Please double-check the URL and make sure your LMS is running and reachable.Server Error-- We can connect to the LMS, but it isn't accepting the activity results. Please check that your credentials are correct.
If you are still having issues, please contact us and we will investigate further.
Note
All activity results that have failed to send while there was an error with your LMS will be re-queued and sent to your LMS within 24 hours.
Supported API's and LMS's
If there is an API or LMS you would like to see supported, please contact us.
Experience API (xAPI)
xAPI (also known as the Experience API or Tin Can API) is an industry API standard for Activity Providers to transmit results to a third-party LMS.
An xAPI Configuration has the following properties:
- xAPI URL: The URL endpoint that the xAPI statements will get sent to. This will be provided by your LMS.
- xAPI Key: The xAPI Key that will be provided by your LMS.
- xAPI Key Secret: The xAPI Key Secret that will be provided by your LMS.
Manage API Keys
Organization API keys allow you to access your analytics data through the online REST API. This feature is only available to Pro and Enterprise plans.
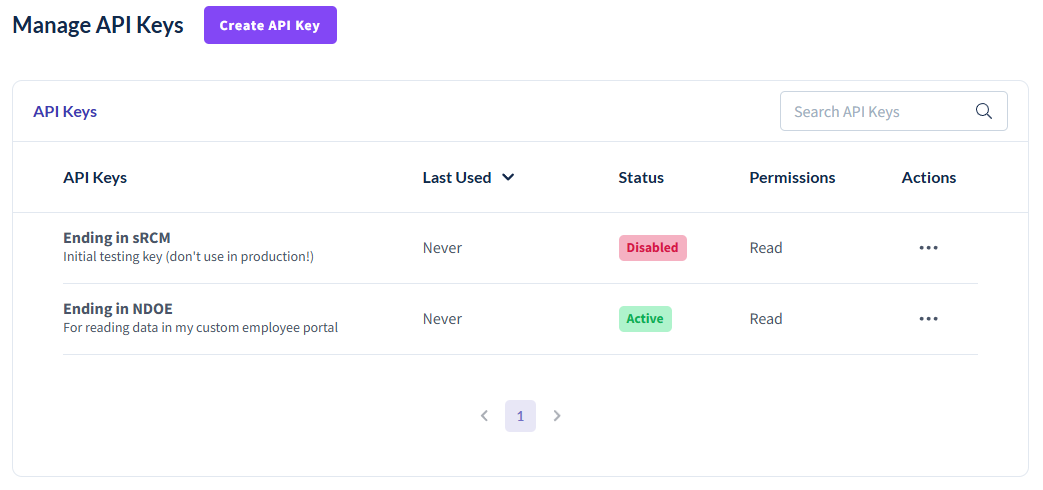
Each organization API key can have a description and can be enabled or disabled as needed. After an organization API key is created, you cannot see it again — it is treated like a password.
If an organization API key hasn't been used for a while, we show a warning next to it. We recommend using Read access unless you have a specific need.
For a list of available API routes, see docs.api.cognitive3d.com
![]() If you have a question or any feedback about our documentation please use the Intercom button (purple circle) in the lower right corner of any web page or join our Discord.
If you have a question or any feedback about our documentation please use the Intercom button (purple circle) in the lower right corner of any web page or join our Discord.