Project Validation
Project Validation is designed to assist developers in setting up Cognitive3D SDK components and features correctly in the Unity Editor. It also helps prevent common issues that could cause data to be collected incorrectly, or not at all. Serving as a checklist, this tool systematically verifies essential steps to configure components and features, including Cognitive3D manager, tracking space, and scene setup.
Project Validation Window
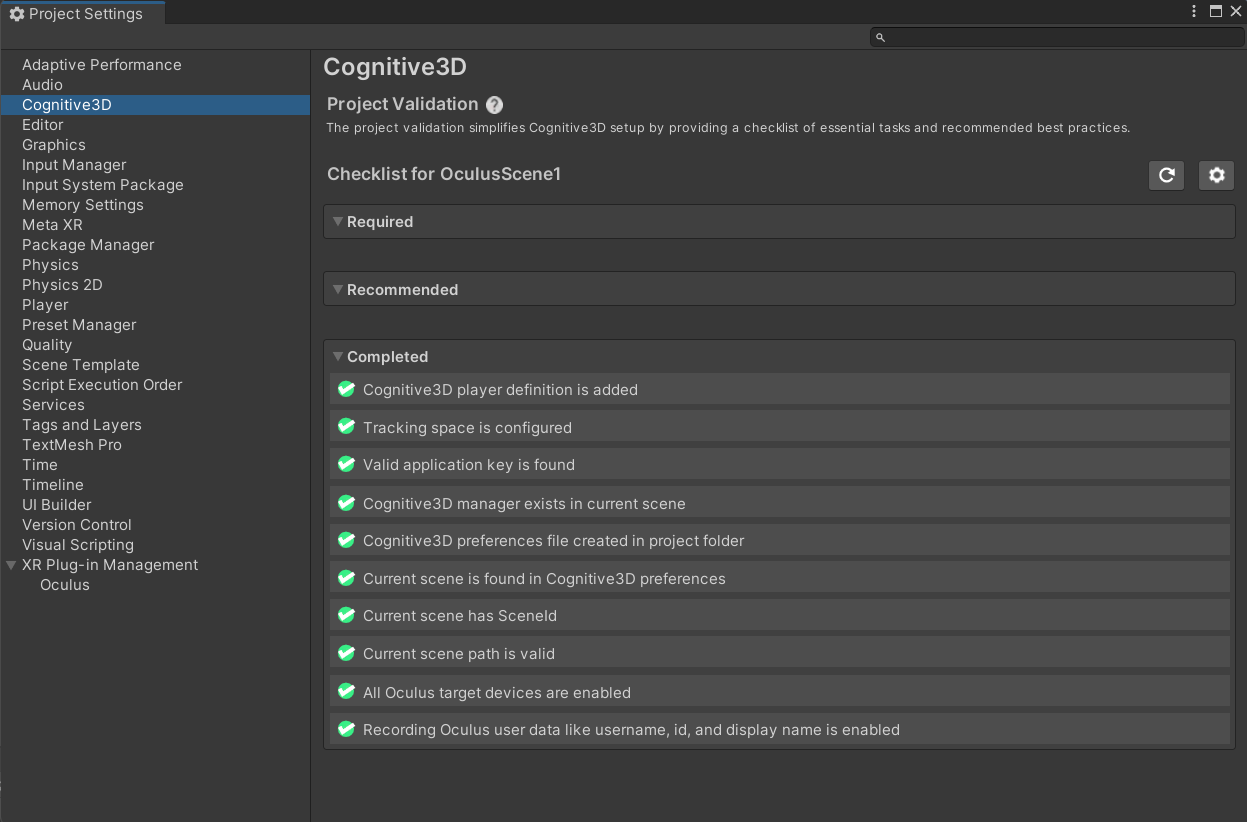
To open the window, go to Project Settings and select Cognitive3D
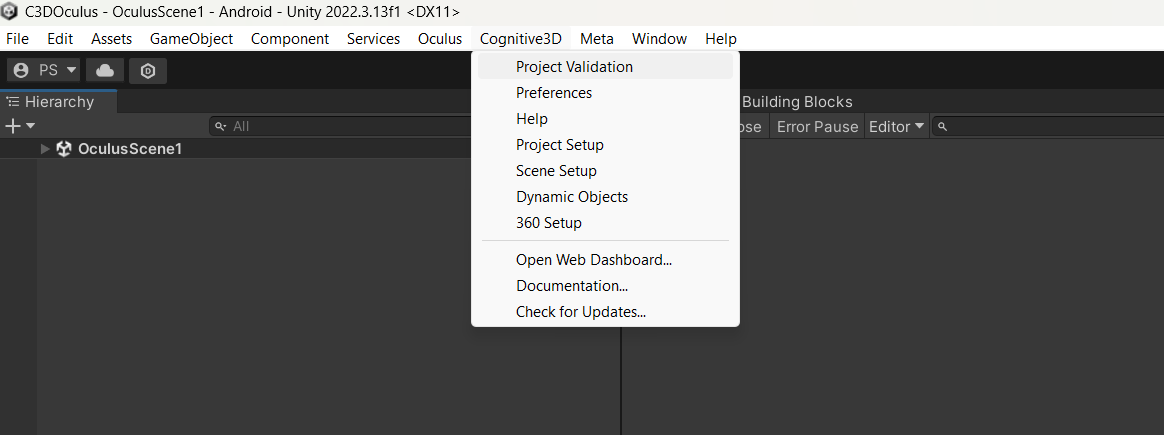
Or open through Cognitive3D Menu > Project Validation.
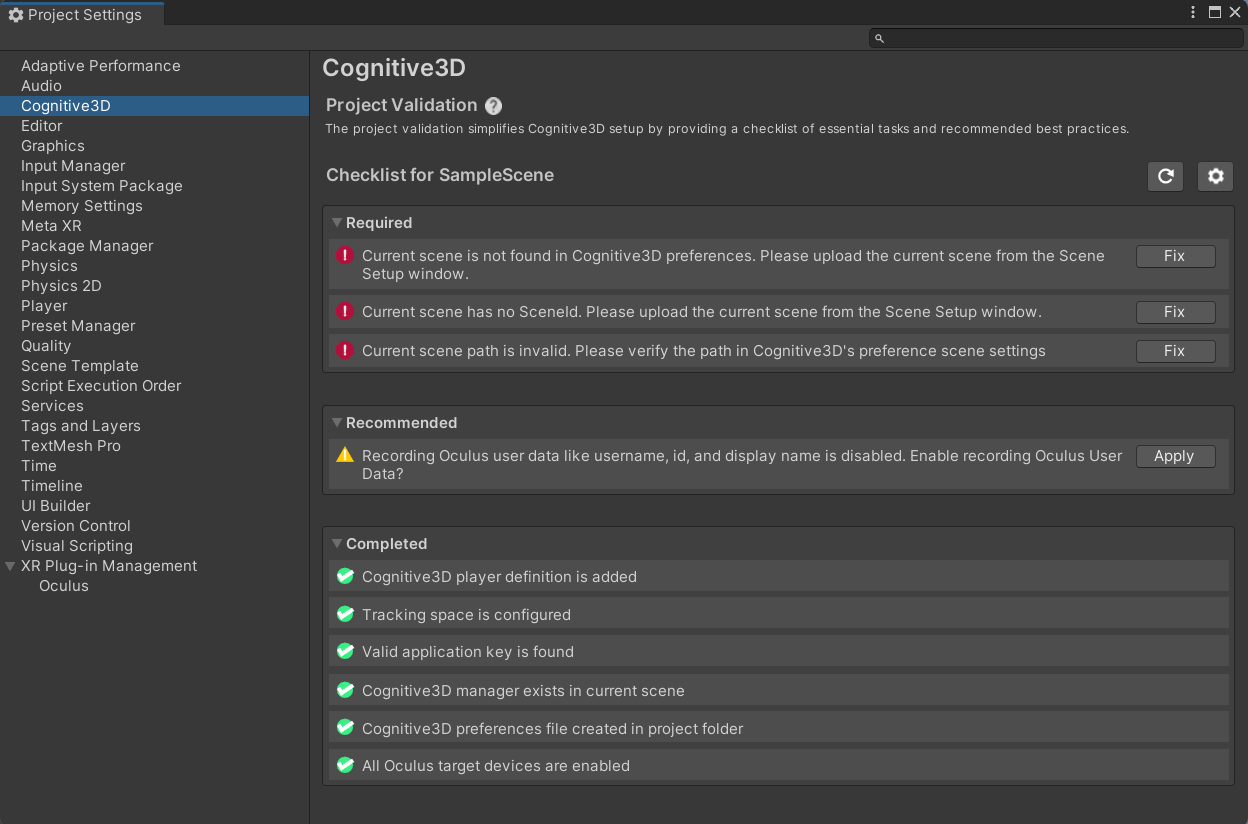
The project validation window will display a list of items that need attention or have been completed. Items with Edit, Fix or Apply buttons allow you to implement necessary adjustments and modifications in your project. The Fix and Apply buttons will automatically make the required changes, while Edit requires manual setup and adjustments.
You can choose to ignore certain project validation items by clicking the Ignore button. This will prevent the tool from prompting you about these items during the build verification process.
Project Validation Item Status
The status of each item is represented by an icon that signifies the priority level of attention required:
| Status | Status Detail |
|---|---|
 |
Requires immediate attention and must be properly fixed and configured. Failure to do so may lead to missing crucial data or inaccurate data collection. |
 |
Requires attention but will not result in mis-collecting data. These may include additional components or features that would enhance the project if included. |
 |
This item has been successfully completed and set up correctly in the current scene. No further action is needed. |
Verify Scenes
The project validation items can be automatically confirmed in each scene included in the build. Before the build process begins, the following verification dialogue will appear:
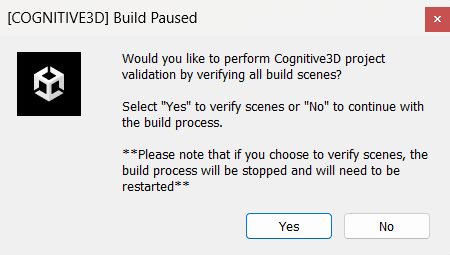
You have the option to begin the verification process for scenes listed in the build settings by selecting Verify or select Skip to skip verification and continue with the build process.
Once the verification process is complete, if any outstanding items remain, the following dialogue will appear:
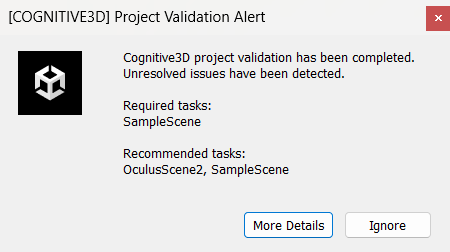
Selecting More Details will open the project validation window, directing you to scenes containing items that require attention.
Once all outstanding items have been addressed, the following dialogue will appear:
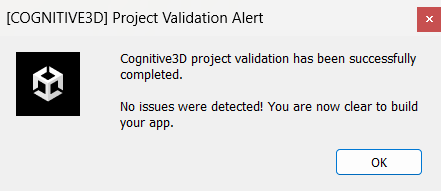
Additional Options
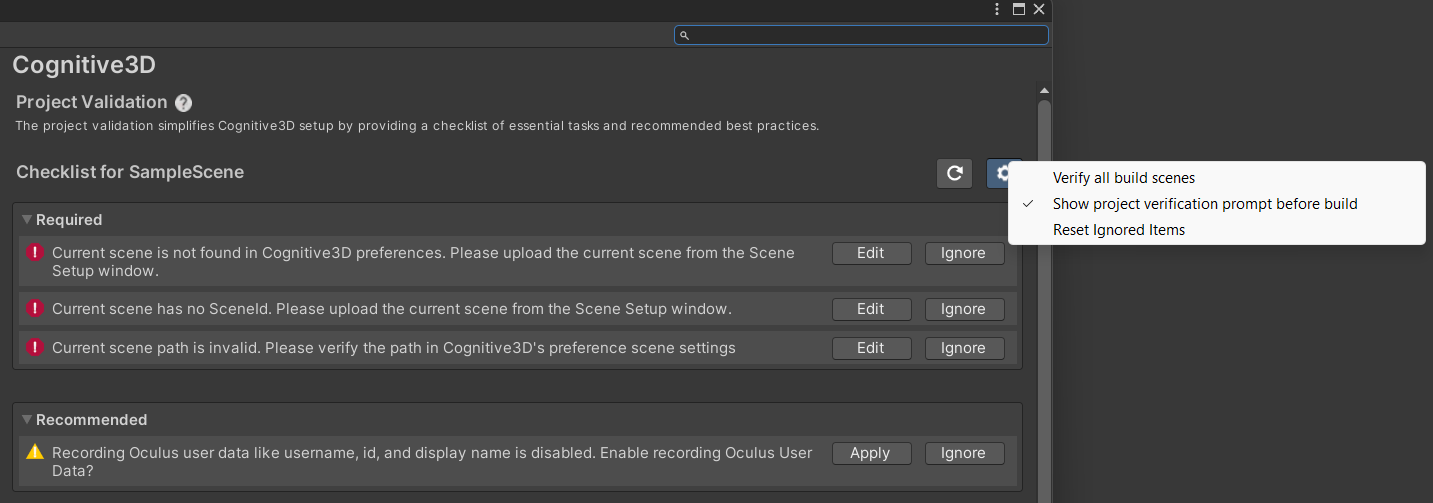
You can access additional project validation options by navigating to ![]() :
:
-
Verify all build scenes: This option provides an alternative method to initiate the verification process for all scenes listed in the build settings before starting the build process.
-
Show project verification prompt before build: Enabling this option will cause the project validation prompt to appear before starting the build process.
-
Reset ignored items: Selecting this option restores previously ignored items, allowing them to be validated along with other items during the build verification process.
![]() If you have a question or any feedback about our documentation please use the Intercom button (purple circle) in the lower right corner of any web page.
If you have a question or any feedback about our documentation please use the Intercom button (purple circle) in the lower right corner of any web page.