Identify
Identify authenticates participants before an XR session so their session data links to a verified identity instead of an anonymous device. Participants sign in on a regular device through your organization's single sign-on (SSO), then enter a short code or scan a QR to sign in on the headset, which avoids entering credentials on an in-headset keyboard.
How it works
Identify connects your existing SSO to a lightweight sign-in page. The flow is:
- The participant signs in through your organization's SSO.
- The launch page shows a short-lived session code and a QR code.
- The participant enters the code, or scans the QR code, in your XR application.
- The session that follows links to their verified identity.
Setting up Identify
You configure Identify from the Organization Settings page. Open the gear icon in the top-right of the menu bar, then select Identify.
If your organization already has an SSO connection, press Setup Identify to connect it. If you do not have an SSO connection yet, contact support to set one up first.
Once Identify is set up, the page shows your connection status and the following controls:
- Enabled -- turn participant sign-in on or off without removing your configuration.
- Admin Portal -- open the SSO configuration portal to manage the connection.
- Disconnect -- remove the Identify configuration. Participants can no longer sign in until you set it up again.
The page also shows your organization's sign-in URL, in the form https://api.cognitive3d.com/v0/identify/sso/login?orgId=<your-org-id>. This is where participants start sign-in. Share it with participants, or link to it from your LMS or training portal.
Launch page settings
The launch page is where participants land after they sign in. Configure its destination and appearance from the Launch Page section of the Identify page. A live preview shows your changes as you make them.
- Return URL -- the page participants land on after signing in. Leave it empty to use the default Cognitive3D launch page.
- Primary Color and Secondary Color -- hex colors that brand the launch page to match your organization.
- Theme -- choose Light, Dark, or System (which follows the participant's device setting).
Press Save to apply your launch page settings.
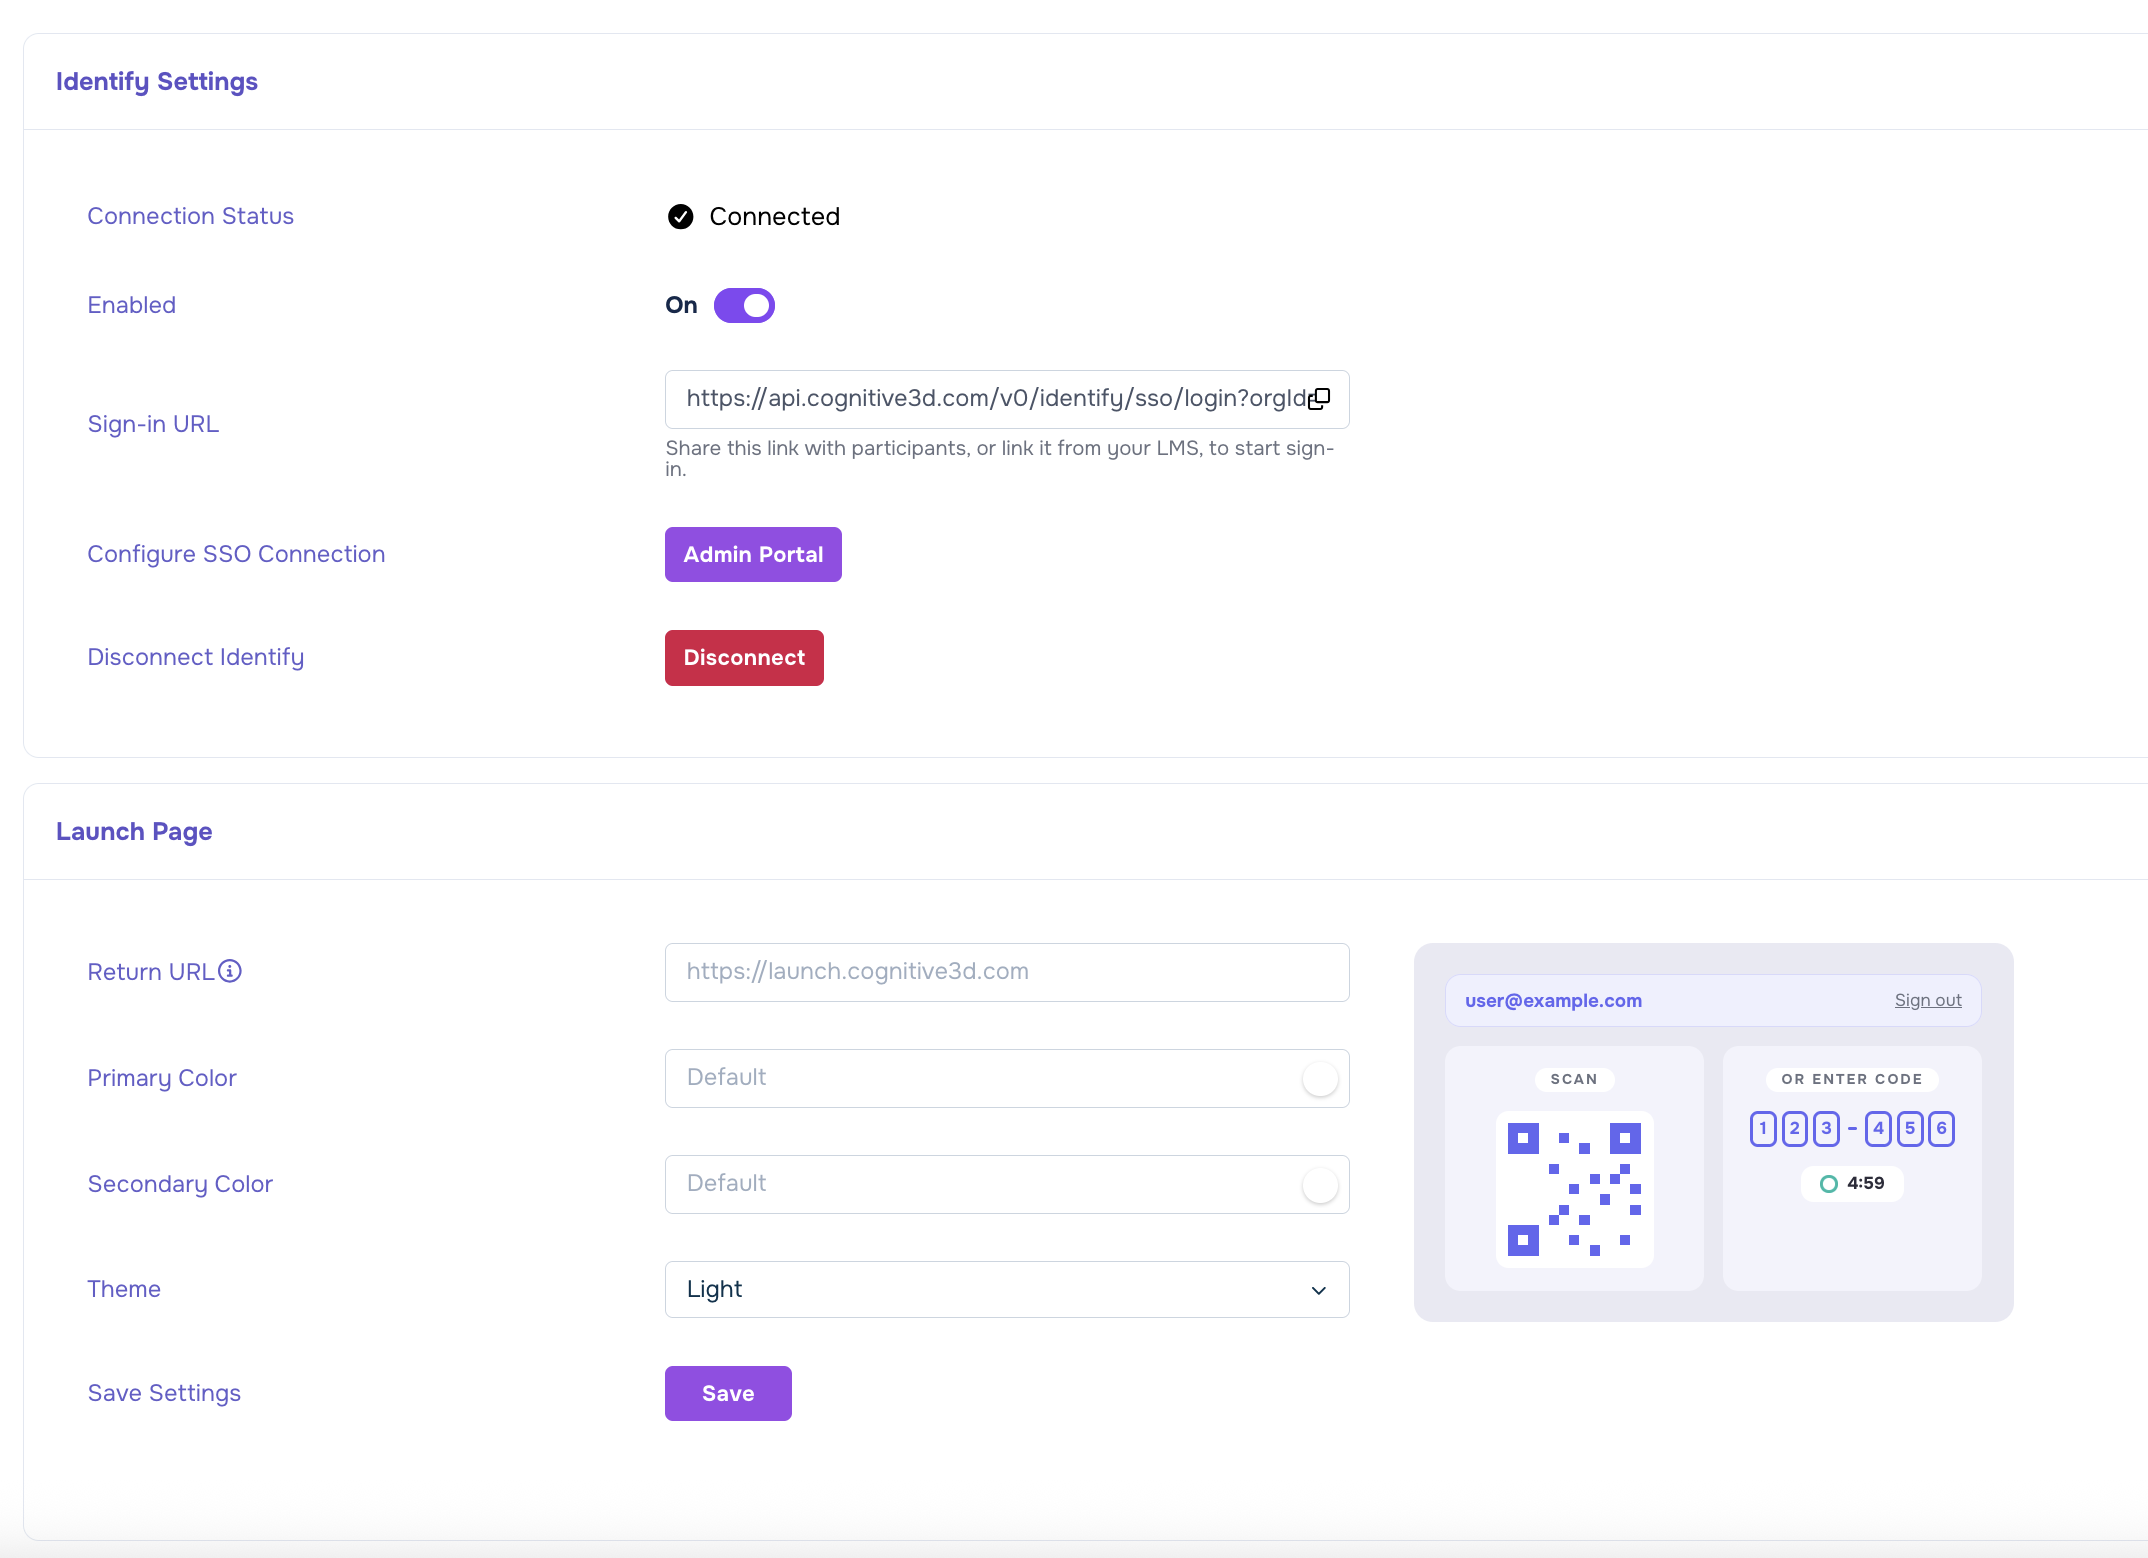
The preview on the right updates as you change the colors and theme.
Tip
Leave the colors empty to use the default Cognitive3D palette. You can also override the branding per session by adding the color and theme values to your own return URL.
The participant experience
Participants open your organization's sign-in URL (from the Identify settings page) and authenticate with your identity provider. After signing in, they land on the launch page.
The launch page shows who the participant is signed in as and presents a session code two ways:
- A QR code the participant can scan from the headset.
- A six-digit code the participant can type in manually.
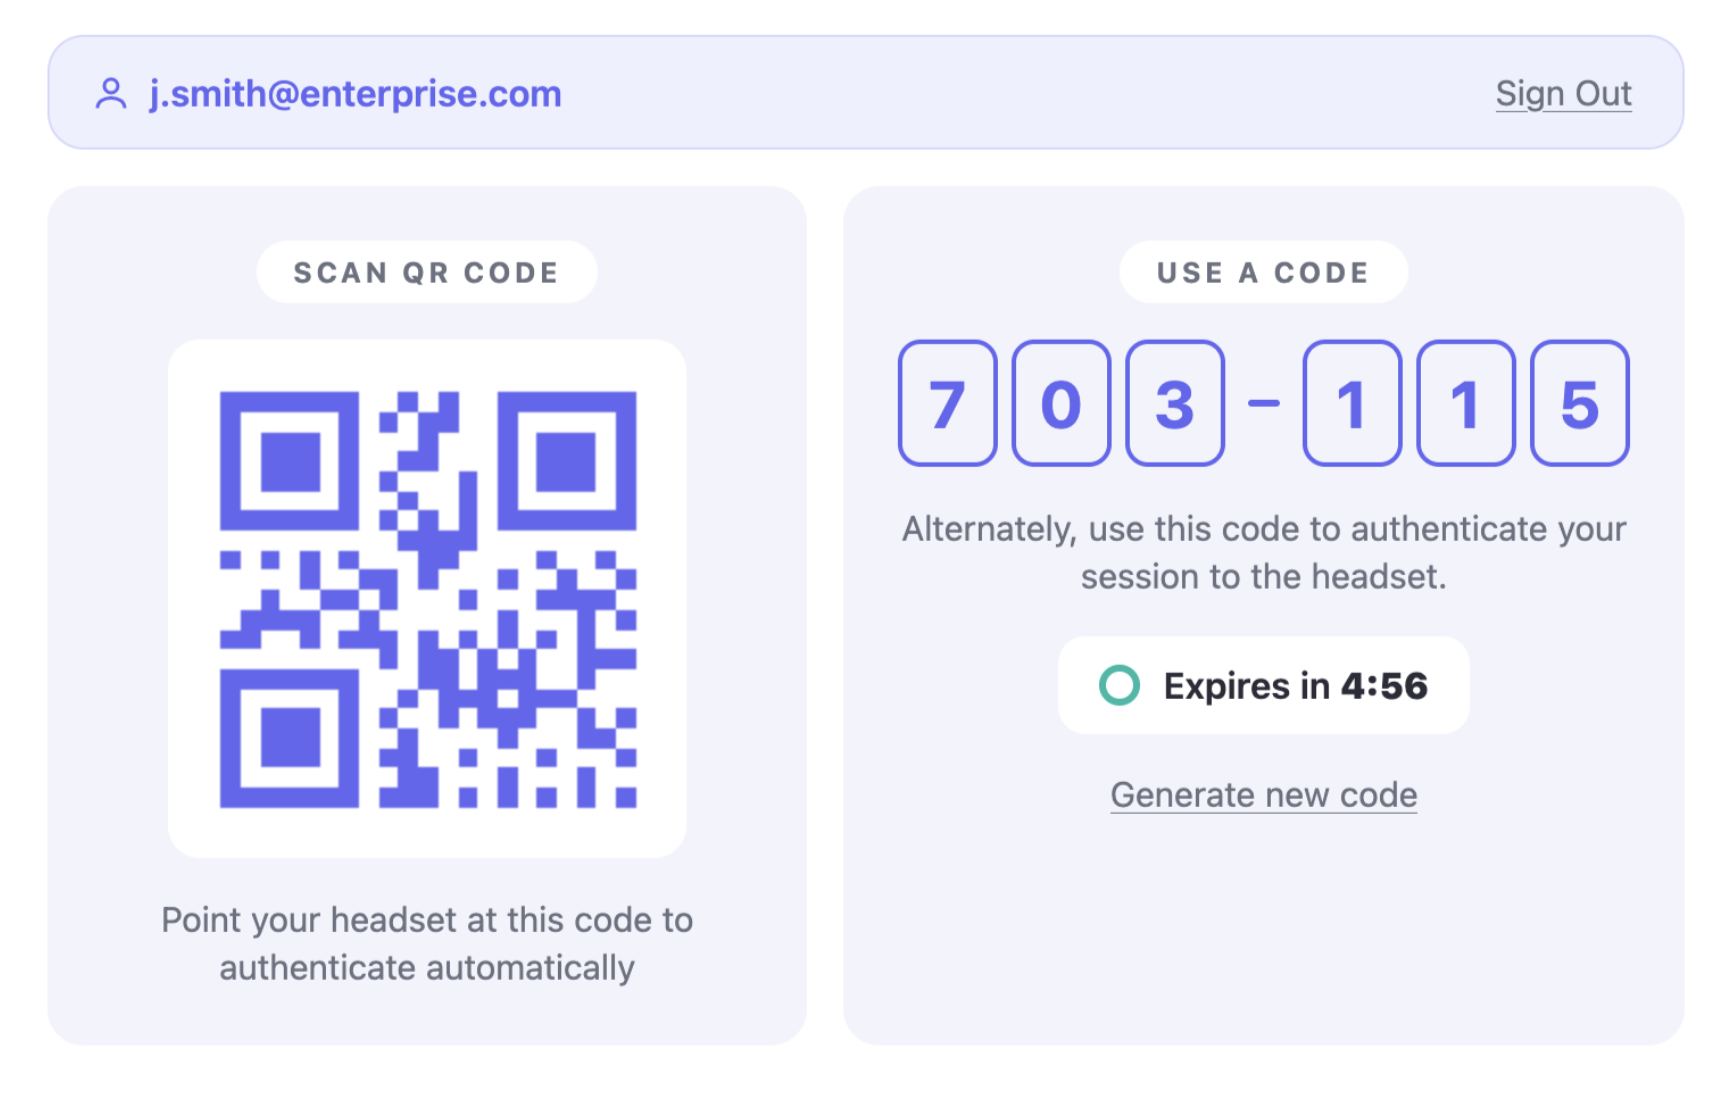
Each code expires after a few minutes. The participant can generate a new code at any time, or sign out to end the session on the launch page.
To start a verified session, the participant enters the six-digit code in your XR application, or scans the QR code if your application supports it. Cognitive3D links the session that follows to their signed-in identity, so it appears under their Participant record in the Dashboard.
Advanced integration
By default, participants use the hosted Cognitive3D launch page. You can instead embed that page in your own site or build a fully custom interface. All three options use the same session token: after a participant signs in, Cognitive3D redirects to your Return URL with the token in a session query parameter.
The API base for the endpoints below is https://api.cognitive3d.com/v0. The session token and code are themselves the credentials, so these endpoints need no API key. Treat them like passwords and keep them out of logs and third-party URLs.
Launch page parameters
The hosted launch page reads the following query parameters. Pass them on the launch page URL, whether you link to it directly or embed it.
| Parameter | Description |
|---|---|
session |
The session token from your Return URL. Required. |
primaryColor |
Hex color for primary UI elements, URL-encoded so the leading # becomes %23 (for example, #6366f1 becomes %236366f1). Overrides the value saved on your configuration. |
secondaryColor |
Hex color for secondary UI elements. Overrides the saved value. |
theme |
light, dark, or system. Overrides the saved value. |
Note
Encode the # in a hex color as %23 when placing it in a URL.
Embedding the launch page
Point your Return URL at a page you control, read the session parameter from its URL, then embed the launch page in an iframe with that token. This example renders the launch page in dark mode:
<iframe
  src="https://identify.cognitive3d.com/?session=SESSION_TOKEN&theme=dark"
  width="720"
  height="480"
  style="border: 0;"
></iframe>
The launch page has a transparent background, so it blends into the surrounding page.
Building a custom interface
To build your own code display, read the session token from your Return URL and mint codes yourself. Send a POST with no body to mint a fresh code for the session:
POST https://api.cognitive3d.com/v0/identify/userSessions/{sessionToken}/codes
The response contains the code, its expiry as a Unix timestamp in milliseconds, and the participant's name:
{
  "code": "123456",
  "expiresAtMs": 1700000000000,
  "name": "Jordan Lee",
  "email": "jordan@example.com"
}
Call the same endpoint again to regenerate the code. To sign the participant out, end the session so its token can no longer mint codes:
DELETE https://api.cognitive3d.com/v0/identify/userSessions/{sessionToken}
The participant enters or scans the resulting code in your XR application, and the Cognitive3D SDK redeems it to attach their verified identity to the session.
See also
- Organization Settings -- manage SSO, members, and other organization-level configuration.
- Participant Summary -- view sessions grouped by verified participant.
![]() If you have a question or any feedback about our documentation please use the Intercom button (purple circle) in the lower right corner of any web page or join our Discord.
If you have a question or any feedback about our documentation please use the Intercom button (purple circle) in the lower right corner of any web page or join our Discord.