Developer Setup
For the fastest and most stable development experience, you can test directly in your desktop browser using an emulator, or connect your Meta Quest headset directly to your computer via USB and use port forwarding.
Desktop Development: Immersive Web Emulator
Testing a WebXR SDK across multiple engine adapters often requires rapid iteration. Continuously putting on and taking off a physical headset can slow down this workflow. The Immersive Web Emulator is an excellent browser extension that allows you to simulate an XR headset and controllers directly on your desktop. This is particularly useful for verifying core API behavior, gaze raycasting, and interaction states without leaving your code editor.
Desktop Development: Immersive Web Emulator Setup
- Install the Extension: Download the Immersive Web Emulator extension for Google Chrome
- Run Your Server: Start your local development server (e.g.,
npm run devathttp://localhost:5173). - Activate the Emulator: Open your browser's Developer Tools and navigate to the WebXR tab.
- Select a Device: Choose a target device (such as a Meta Quest 2 or 3) from the device list to emulate its specific controller profile and field of view.
You can now use your mouse and keyboard to move the virtual headset and controllers, trigger button presses, and test interactions instantly.
Physical Device: Meta Quest Setup
Physical Device: Meta Quest Setup Requirements
- Developer Mode: Ensure Developer Mode is enabled on your Meta Quest headset.
- Meta Quest Developer Hub (MQDH): Download and install MQDH on your development computer.
- USB3 Cable: You'll need a compatible USB3 cable to connect your headset to your computer.
Setup
1. Connect Your Headset
Connect your Quest to your computer with the USB-C cable. Inside the headset, you may see a prompt to "Allow USB debugging." Be sure to "Allow" it.
2. Start the Dev Server
In your project's terminal, start the local development server as usual:
npm run dev
This will typically run the project on http://localhost:5173.
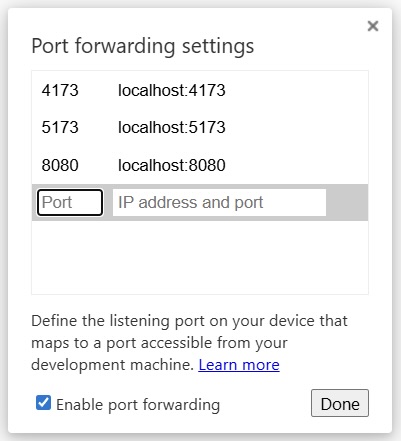
3. Configure Port Forwarding in Chrome
Open Google Chrome on your computer and navigate to chrome://inspect/#devices.
- Select the "Port forwarding" tab.
- Configure a new rule:
- Port:
5173 - IP address and port:
localhost:5173
Make sure the Enable port forwarding checkbox is checked
Launch in Headset
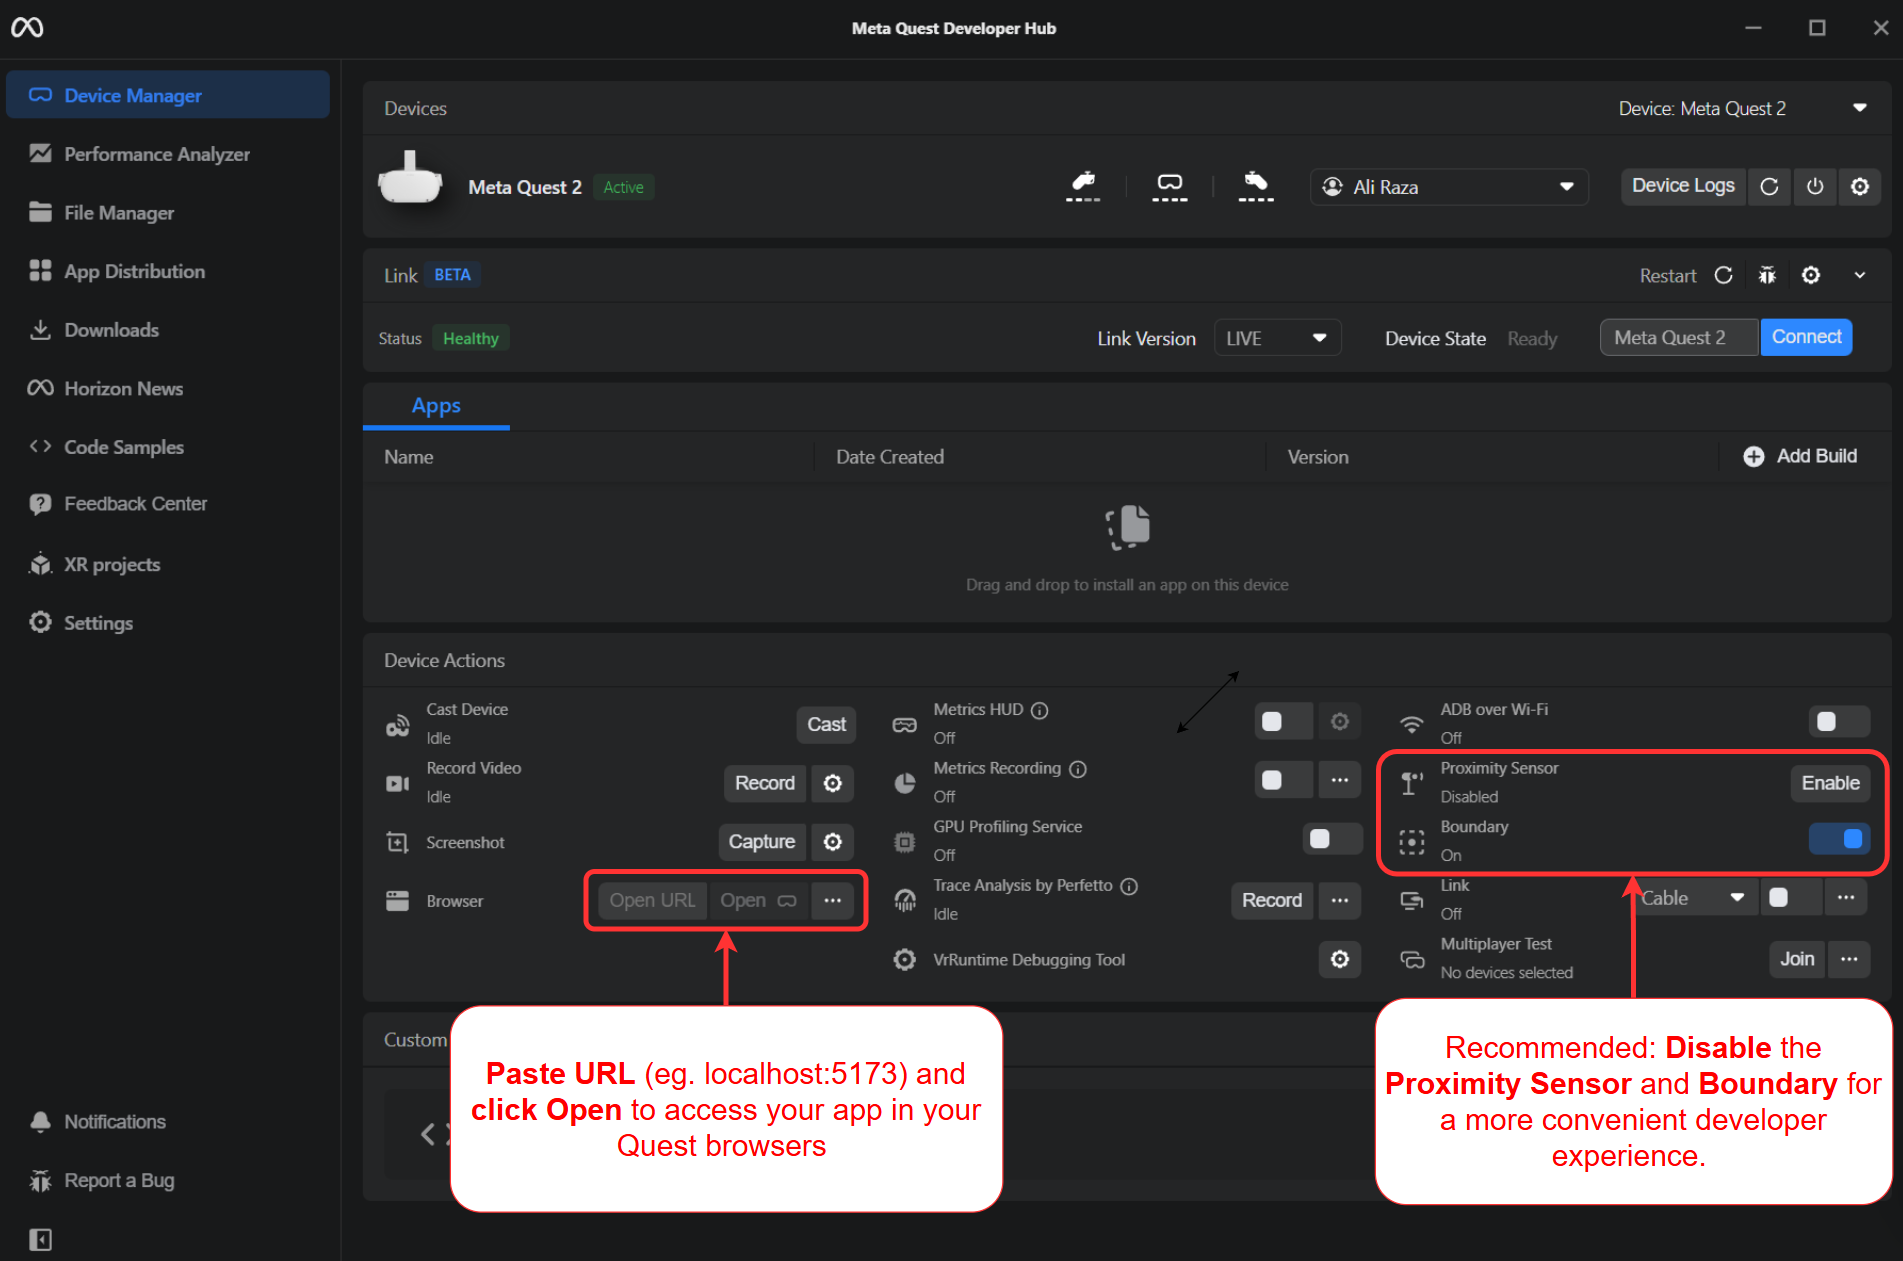
- Copy and paste
localhost:5173into the MQDH and click Open or in the Quest Browser's address bar, simply typelocalhost:5173and press enter. - Your app will now open in the Meta Quest Browser.
Meta Quest Browser Developer Console
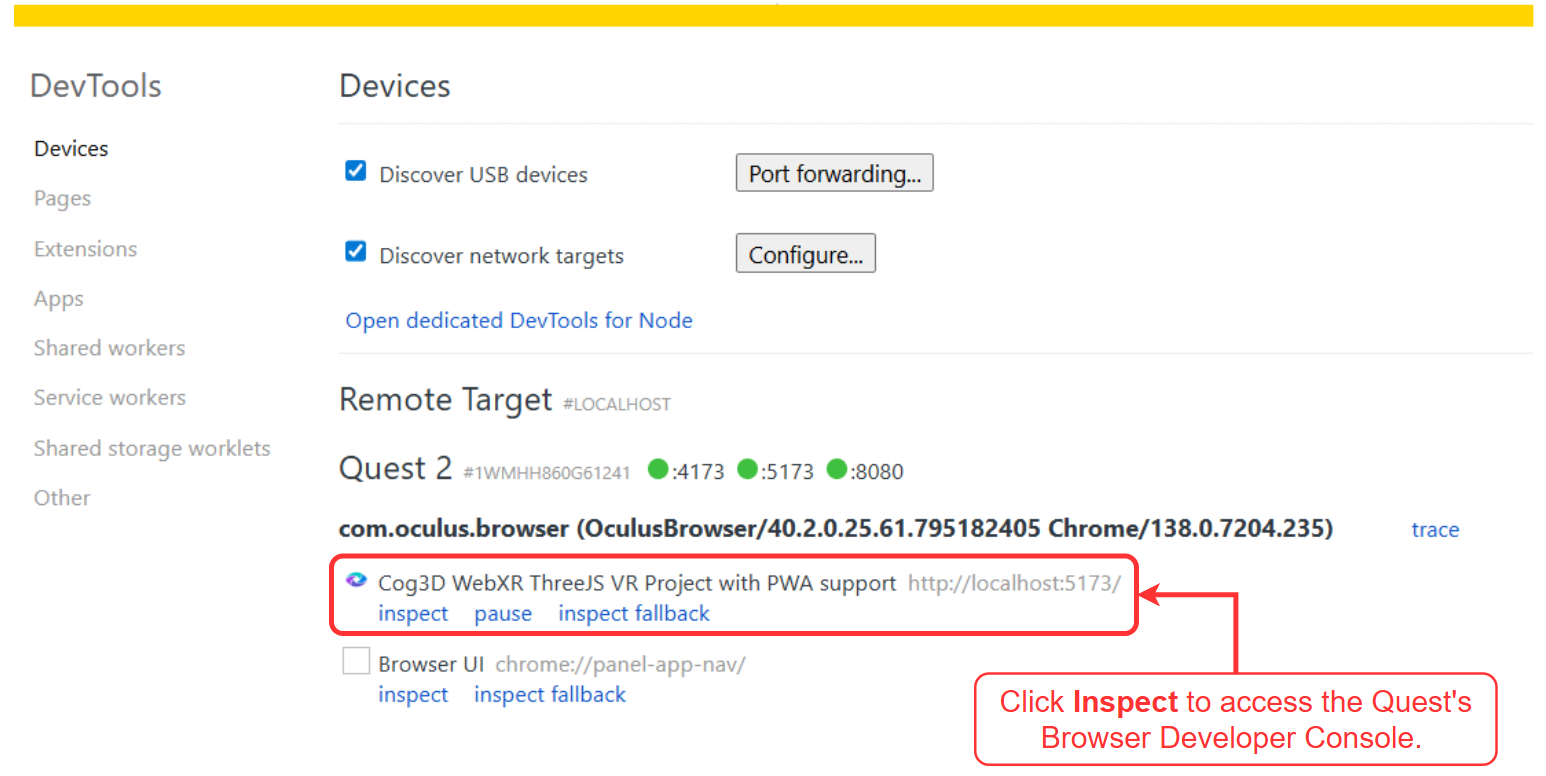
To view the Meta Quest Developer Console, your application must be running in the Meta Quest Browser. Once the page is active, an Inspect link will appear below your device name in chrome://inspect/#devices.
 If you have a question or any feedback about our documentation please use the Intercom button (purple circle) in the lower right corner of any web page or join our Discord.